
Can You Boil a Carburetor in Simple Green? Aluminum Safety and Thermal Limits
✨ This article was AI edited. Editorial responsibility: CrownClassicCleaners.net.
Produced with AI. This article was artificially generated. Editorial responsibility: CrownClassicCleaners.net.
No, you should never boil a carburetor in Original Simple Green. Original Simple Green is an alkaline cleaner with an active pH of approximately 9.5; when subjected to elevated temperatures near boiling (212°F / 100°C), the alkaline hydroxide ions aggressively react with the amphoteric aluminum and zinc die-cast alloys, causing rapid chemical etching, permanent black oxidation, severe surface pitting, and irreversible clogging of precision micro-fuel metering passages. To clean an aluminum carburetor safely, use an ultrasonic cleaner filled with Simple Green Pro HD or Extreme Simple Green Aircraft Cleaner heated to no more than 120°F (50°C).
Among DIY mechanics, vintage motorcycle restorers, and small-engine technicians, internet forums frequently debate kitchen-stove hacks for clearing varnished gasoline and ethanol gum from gummed-up carburetors. One of the most prevalent and destructive myths is the practice of boiling a stripped carburetor body in a pot of concentrated Simple Green on a home stove. While boiling water and degreaser seems like an intuitive method to dissolve stubborn carbon deposits and fuel varnish without buying an expensive dipping basket or aerosol cans, combining high thermal energy with alkaline surfactants creates a devastating chemical reaction on non-ferrous metals.
Metallurgy of Carburetors: Why Alloys React
Modern and vintage carburetors (whether manufactured by Mikuni, Keihin, Holley, Carter, or Briggs & Stratton) are not fabricated from simple sheet metal or stainless steel. Instead, they are precision-engineered from delicate, low-melting-point non-ferrous casting alloys:
- Die-Cast Aluminum Alloys (ADC12 / 380 Alloy): Lightweight and easily cast with complex internal geometries, but highly susceptible to chemical etching in non-neutral pH environments.
- Zamak / Zinc Die-Cast (“Pot Metal”): Commonly used in vintage American carburetors. Zamak contains zinc blended with small percentages of aluminum, magnesium, and copper. It is exceptionally vulnerable to intergranular corrosion and dimensional distortion when exposed to heated alkaline or acidic baths.
- Brass Metering Jets & Emulsion Tubes: Highly precise copper-zinc alloys with calibrated orifice tolerances measured in thousandths of an inch (0.001″). Even slight etching alters fuel flow rates, ruining air-fuel ratios.
- Nitrile & Viton Elastomers: Rubber accelerator pump diaphragms, float needle valve tips, and throttle shaft seals degrade rapidly in boiling hot solvents.
The Chemical Mechanism: Amphoteric Etching & Temperature Acceleration
To understand why boiling is catastrophic, one must examine the chemical properties of aluminum. Aluminum is an amphoteric metal, meaning it dissolves readily in both strong acids and strong bases. Under ambient conditions, aluminum forms a microscopic, passive aluminum oxide film (Al2O3) that shields the underlying metal from environmental oxidation.
However, Original Simple Green contains alkaline builders, ethoxylated alcohols, and water-soluble glycol ethers with a pH of approximately 9.35 to 9.5. When applied at room temperature and rinsed within 5 to 10 minutes, the impact is minimal. But when heated toward boiling:
- Breakdown of the Passive Oxide Layer: The alkaline hydroxide ions attack and dissolve the protective Al2O3 layer:
Al2O3 + 2OH⁻ + 3H2O → 2[Al(OH)4]⁻ - Aggressive Reaction with Pure Aluminum: Once the bare alloy is exposed, the alkaline solution reacts directly with raw aluminum, releasing hydrogen gas and producing water-soluble aluminate salts:
2Al + 2OH⁻ + 6H2O → 2[Al(OH)4]⁻ + 3H2(g) - The Arrhenius Temperature Acceleration Factor: In physical chemistry, reaction rates roughly double for every 10°C (18°F) increase in temperature. Raising an ambient 70°F (21°C) solution to a rolling boil of 212°F (100°C) accelerates the corrosive etching reaction by nearly 250 to 500 times. Within 15 minutes of boiling, the outer surface is eaten away, precision pilot jet passages are enlarged or pitted shut, and the entire casting turns a dark, chalky charcoal black.
Comparison of Carburetor Cleaning Methods
Before selecting a cleaning technique for your carburetor rebuild, compare the safety, cost, and risk profile across common workshop approaches:
| Cleaning Method | Target Chemical / Medium | Aluminum Safety Rating | Cleaning Efficacy | Risk of Component Ruin |
|---|---|---|---|---|
| Boiling in Original Simple Green | Alkaline Degreaser (pH 9.5) @ 212°F | Dangerous / Destructive | High on grease; ruins metal | Extreme (Severe pitting & blackening) |
| Heated Ultrasonic Cleaner | Simple Green Pro HD / Aviation (pH 7.8) @ 110°F–120°F | Excellent (Safe) | Superior (Reaches blind cavities) | Negligible if diluted properly |
| Traditional Solvent Dip Basket | Cresylic acid / Chlorinated hydrocarbon bath | Good for bare metal; toxic | Very High (Melts all fuel varnish) | Destroys plastic & rubber seals instantly |
| Aerosol Carb Cleaner & Compressed Air | Acetone, toluene, methanol blend | Safe on aluminum; manual effort | Moderate (Requires manual brushing) | Low (Wear eye protection) |
| Vapor / Soda Blasting | Sodium bicarbonate slurry or fine glass beads | Excellent (Cosmetic finish) | Highest for exterior restoration | Must flush blast media completely |
Original Simple Green vs. Simple Green Pro HD & Extreme Aircraft Cleaner
Many mechanics confuse different formulations within the Simple Green product line. Simple Green manufactures specialized industrial formulas explicitly designed for aviation and automotive aluminum:
- Original Simple Green (Green Liquid): Formulated with a pH of ~9.5. The manufacturer’s official technical bulletin explicitly warns that prolonged soaking of aluminum without immediate rinsing can cause discoloration and pitting. It is NOT safe for boiling or heated submersion.
- Simple Green Pro HD Heavy Duty Cleaner (Purple Liquid): Professional-grade degreaser formulated to be non-corrosive to metals, including aluminum, steel, and zinc. Its pH is optimized for metal parts washing.
- Extreme Simple Green Aircraft & Precision Cleaner (Clear Liquid): Engineered specifically to meet rigorous military and aerospace standards (Boeing Spec D6-17487P, AMS 1526B, ASTM F483). It contains dedicated corrosion inhibitors that prevent galvanic pitting on raw aircraft-grade aluminum, even inside heated ultrasonic tanks up to 130°F (54°C).
The Correct, Safe Procedure to Clean a Dirty Carburetor
Step 1: Total Mechanical Teardown
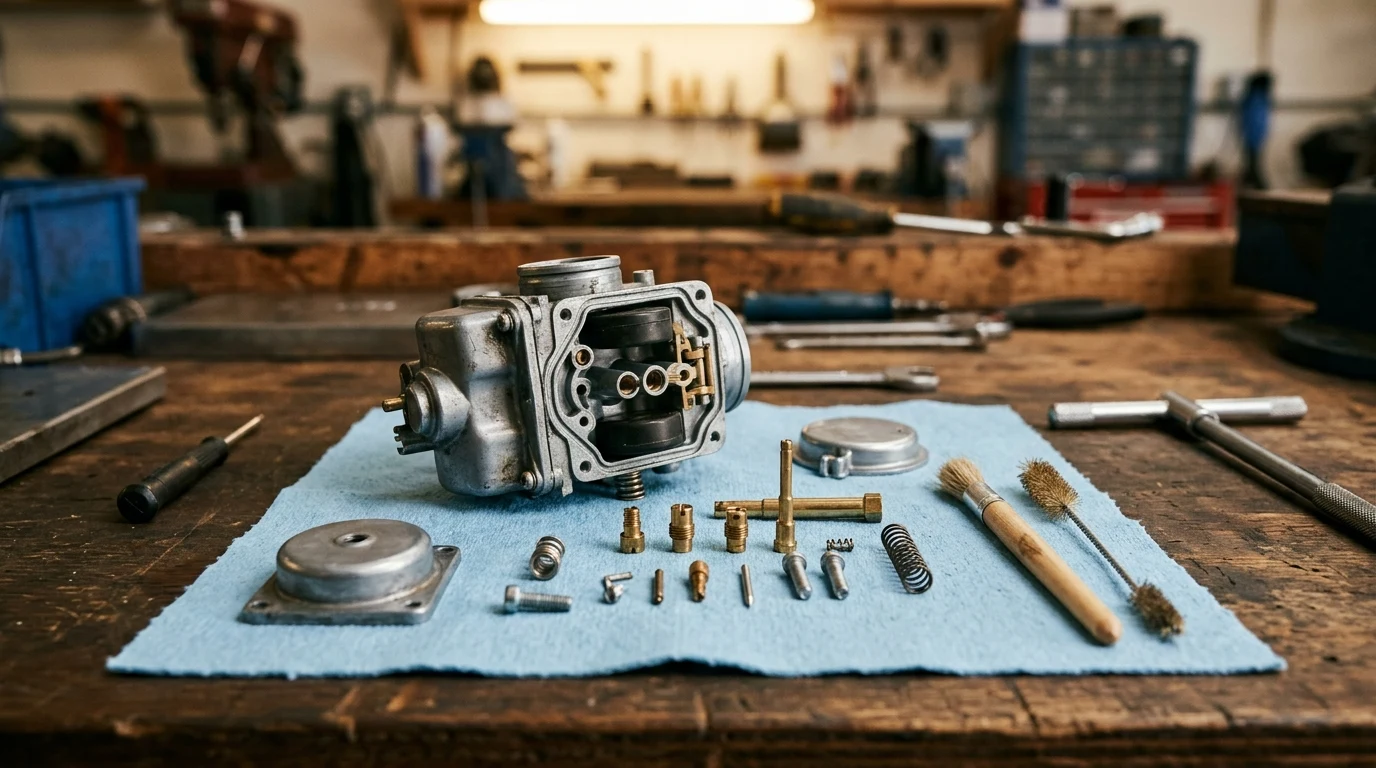
Never soak an assembled carburetor. Strip the unit completely down to its bare casting. Remove all rubber O-rings, float bowl gaskets, viton-tipped needle valves, fuel mixture screw washers, and plastic float pivots. Unscrew the main jet, pilot (slow) jet, needle jet, and idle mixture screws. Keep delicate brass components segregated in a labeled tray.
Step 2: Ultrasonic Tank Preparation
The single most effective modern technique for cleaning carburetors is an ultrasonic cleaning machine utilizing cavitation micro-bubbles to scour blind internal passages. Fill the ultrasonic tank with clean water and dilute Simple Green Pro HD (Purple) or Extreme Simple Green Aircraft Cleaner at a ratio of 1 part cleaner to 3 parts distilled water (25% concentration).
Step 3: Controlled Temperature Submersion
Set the ultrasonic tank heater between 110°F and 120°F (43°C to 49°C). Never allow the bath to exceed 130°F (54°C). Submerge the carburetor body and brass jets in the wire basket so that all fuel ports are submerged and air pockets escape. Run an ultrasonic cycle for 20 to 30 minutes. The high-frequency sound waves (35 kHz to 40 kHz) create millions of microscopic vacuum implosions that blast fuel varnish away from the internal emulsion tubes without etching the base metal.
Step 4: Immediate Deionized Water Flush
As soon as the cycle ends, pull the components from the bath. Immediately flush all external surfaces and blow through every internal passage with clean, hot deionized or distilled water to halt any chemical residue. Follow immediately with a blast of 90 PSI compressed air through every jet hole to drive out trapped moisture.
Step 5: Fuel Passage Verification
Spray dedicated aerosol carburetor cleaner (containing acetone and toluene) through the pilot jet hole while watching the tiny transition ports located near the throttle butterfly valve. You should observe crisp, solid fluid jets emerging from each micro-port. If flow is restricted, thread a soft copper wire or dedicated torch-tip cleaner through the orifice—never use hardened steel wire, which scores the calibrated brass bore.
What to Do If You Already Boiled a Carburetor and It Turned Black
If you have already made the mistake of boiling your carburetor in Original Simple Green or a dishwasher and found the casting coated in a dark, smutty black film, the metal has suffered surface oxidation and chemical desmutting failure. Here is how to salvage the casting:
- Acidic Desmutting Wash: Submerge the darkened body in a mild acidic solution, such as a 5% to 10% solution of household white vinegar or a dedicated aluminum brightener (containing mild phosphoric acid), for no more than 3 to 5 minutes. The mild acid neutralizes residual alkaline salts and dissolves the loose surface smut.
- Mechanical Agitation: Scrub the exterior surfaces with a fine brass-wire detail brush or non-abrasive Scotch-Brite pad lubricated with WD-40. Brass bristles are softer than aluminum and will strip the oxidized chalk without galling the casting.
- Baking Soda (Sodium Bicarbonate) Wet Blasting: For a factory-new finish, use a hobbyist sandblaster pressurized with baking soda. Baking soda has a Mohs hardness of 2.5, which removes the dark oxidation layer without altering precision machining tolerances or damaging delicate threads.
Frequently Asked Questions
Can I clean a carburetor by boiling it in plain water?
Boiling a carburetor in 100% plain distilled water will soften old gasoline gum without chemically etching the aluminum. However, water alone lacks the chemical solvency to break down baked-on carbon or oil varnish, and boiling tap water containing high dissolved mineral content can deposit hard calcium scale inside narrow fuel orifices. An ultrasonic cleaner with aviation-safe cleaner is vastly superior.
Can I use Pine-Sol instead of Simple Green?
Pine-Sol is another popular forum suggestion that carries significant risks. While older Pine-Sol formulas contained real pine oil terpenes that cut grease well, modern formulations contain glycolic acid, secondary alcohols, and synthetic surfactants. Prolonged soaking in Pine-Sol can discolor aluminum, swell hidden rubber passage plugs, and leave a persistent sticky pine resin residue inside microscopic emulsion holes.
Will carb cleaner spray dissolve rubber O-rings?
Yes. Aerosol carburetor cleaner blends contain aggressive aromatic hydrocarbons (acetone, xylene, toluene) that cause natural rubber, neoprene, and even Viton O-rings to swell, soften, and degrade within seconds. Always strip every rubber, plastic, and paper gasket before spraying aerosol cleaners onto carburetor components.
Get our latest guides, news, and insights highlighted in your Google Search & AI Overviews.


