
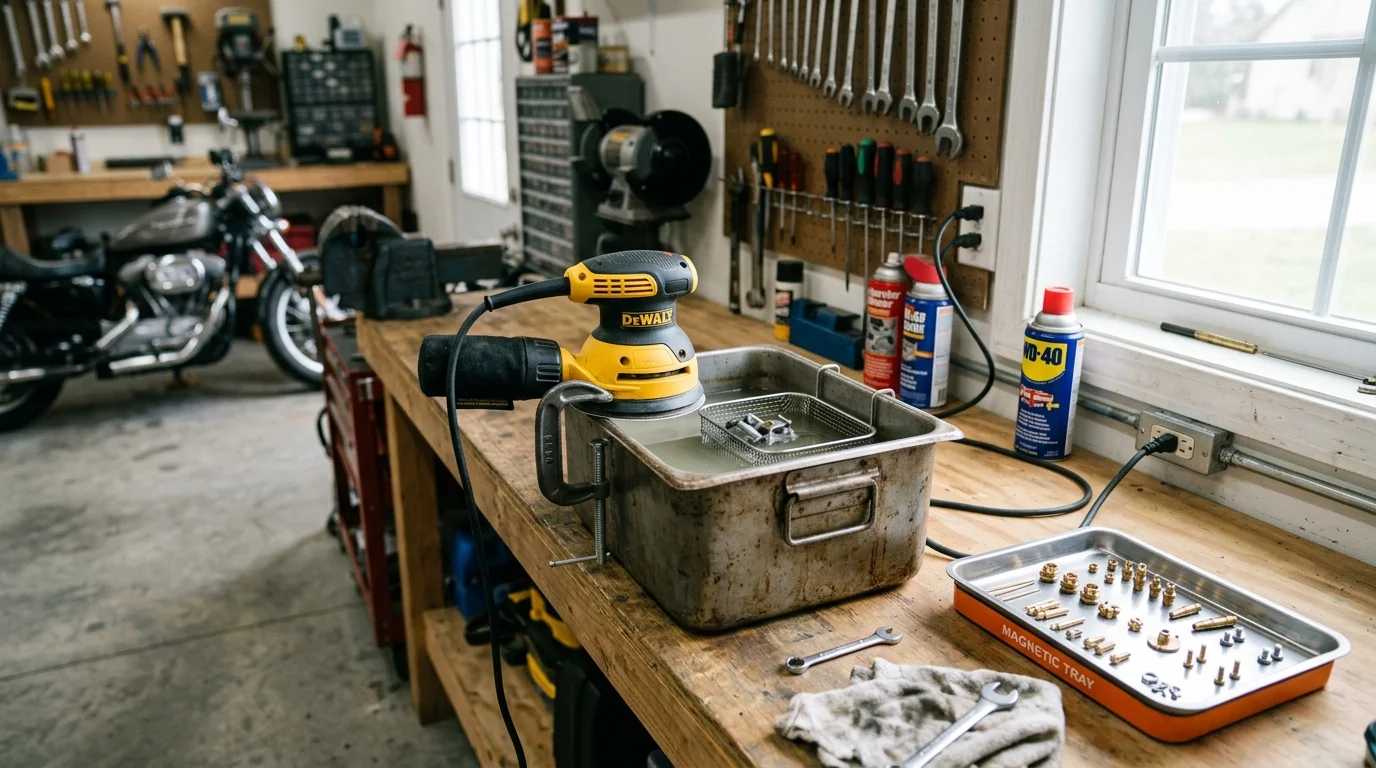
Palm Sander Made Into a Carburetor Cleaner: How DIY Vibration Tanks Work and Safety Risks
✨ This article was AI edited. Editorial responsibility: CrownClassicCleaners.net.
Produced with AI. This article was artificially generated. Editorial responsibility: CrownClassicCleaners.net.
A palm sander made into a carburetor cleaner is an improvised workshop setup where an electric orbital sander is clamped to a metal solvent container to agitate cleaning fluid around submerged engine parts. While the 100 Hz to 200 Hz vibration increases bulk solvent circulation and dislodges loose external sludge, it cannot produce true ultrasonic cavitation (35,000 Hz to 40,000 Hz) needed to scour microscopic fuel jets. Furthermore, operating an electric power tool with an open-sparking brush motor directly adjacent to flammable solvents presents an extreme fire and explosion hazard.
Across vintage motorcycle forums, lawnmower repair channels, and budget automotive communities, hobbyists frequently showcase an ingenious low-cost hack: clamping an ordinary electric palm sander or random orbital sander to a steel pot, metal ammo box, or coffee can filled with degreaser or carburetor solvent. The concept aims to create a “poor man’s ultrasonic cleaner” that shakes varnish, gum, and carbon off gummed-up carburetor castings without investing in an expensive professional ultrasonic machine. However, analyzing this contraption through the lenses of physics, chemical solvency, and workshop safety reveals significant limitations and severe fire hazards that every mechanic must understand.
Mechanical Vibration vs. True Ultrasonic Cavitation: The Physics
The primary misconception driving the DIY sander-cleaner build is that mechanical vibration is equivalent to ultrasonic cleaning. In reality, the physical mechanisms operating at the fluid-metal interface are fundamentally different:
| Operational Parameter | Palm / Orbital Sander Rig | Benchtop Ultrasonic Cleaner | Chemical Cold Dip Basket |
|---|---|---|---|
| Operating Frequency | 100 Hz to 200 Hz (6,000 to 12,000 OPM) | 35,000 Hz to 40,000 Hz (35 kHz to 40 kHz) | 0 Hz (Static chemical immersion) |
| Primary Cleaning Mechanism | Macroscopic fluid sloshing & bulk displacement | Microscopic acoustic cavitation implosions | Chemical dissolution of organic binders |
| Penetration of Micro-Passages | Negligible; fluid boundary layer remains stagnant | Complete; cavitation bubbles form inside 0.010″ jets | High; relies on capillary diffusion time |
| Bubble Size & Energy Dynamics | Visible air bubbles formed by turbulent splashing | Microscopic vacuum voids (1 to 10 microns) | None (Dissolution only) |
| Fire & Explosion Risk | Extreme (Electric motor sparks near vapors) | Low to Zero (Sealed piezoelectric transducers) | Low (No electrical components) |
| Equipment Longevity | Destroys sander bearings within hours | Engineered for continuous duty cycles | Reusable indefinitely with basket |
When an ultrasonic transducer energizes a water-based bath at 40 kHz, it creates high-frequency compression and rarefaction sound waves. During rarefaction, the local pressure drops below the vapor pressure of the liquid, creating millions of microscopic vacuum bubbles. During the following compression phase, these micro-bubbles collapse violently, generating localized micro-jets with pressures up to 10,000 PSI and localized temperatures of several thousand degrees Kelvin. These micro-implosions physically scour baked-on varnish from the deepest blind corners of idle fuel passages and pilot orifices. In contrast, an orbital sander merely displaces bulk fluid back and forth; surface tension and laminar flow prevent the vibrating fluid from penetrating micro-orifices where fuel meters.
The Critical Hazard: Motor Arcing and Flammable Vapors
The most dangerous aspect of building a sander-powered cleaning tank is the proximity of electrical sparks to volatile hydrocarbon solvents:
- Universal Brush Motor Arcing: Most consumer palm sanders and orbital sanders utilize brushed universal electric motors. When the carbon brushes make and break contact with the spinning copper commutator segments, they produce continuous, visible electrical sparks inside the motor casing.
- Low Flash-Point Solvents: If a DIY builder fills the cleaning container with flammable automotive solvents—such as lacquer thinner (flash point ~32°F / 0°C), acetone (flash point ~-4°F / -20°C), or mineral spirits (flash point ~105°F / 40°C)—the vigorous vibration accelerates the evaporation rate, filling the immediate workspace with a dense cloud of volatile solvent vapors.
- The Ignition Sequence: The sander’s built-in cooling fan draws ambient air directly across the open motor brushes and out through the vents. Drawing flammable solvent vapors into an active spark chamber creates an immediate explosion and flash fire that can engulf the workbench and operator.
Mechanical Failure: Why Sanders Burn Out Rapidly
Handheld sanders are engineered to operate with a light downward hand load against flat wood or drywall. Clamping the vibrating shoe or pad tightly against a rigid steel pot or heavy ammo box subjects the internal components to severe abnormal stresses:
- Bearing Overheating: The intense counter-mass of liquid and metal parts generates excessive harmonic resonance, overheating the sealed needle bearings within 15 to 30 minutes of continuous running.
- Eccentric Counterweight Failure: The orbital counterweight assembly is balanced for lightweight foam sanding pads, not the mass of a multi-quart container. The resulting mechanical imbalance tears out motor mount bushings and causes stator coil breakdown.
- Liquid Contamination: Fluid splashing from the open reservoir frequently enters the motor ventilation slots, degrading the electrical insulation and causing short circuits.
The Right Way: Proven, Safe Methods for Cleaning Carburetors
Rather than risking severe fire or ruining power tools with an improvised vibration rig, utilize one of the three established, professional techniques for revitalizing dirty carburetors:
Method 1: Modern Heated Ultrasonic Tank
Today, dedicated stainless steel ultrasonic cleaning machines with integrated digital heaters and timer controls cost roughly the same as a brand-new orbital sander. Fill the tank with a safe, non-corrosive aqueous cleaner—such as Simple Green Pro HD (Purple) or Extreme Simple Green Aircraft Cleaner diluted 1:3 with distilled water. Heat the bath to 115°F to 125°F (46°C to 52°C) and run a 20-minute cycle. The piezoelectric transducers generate true cavitation with zero sparks, zero toxic fumes, and superior cleaning penetration.
Method 2: Chemical Cold Dip Tank (Berryman Chem-Dip)
For carburetors with heavy petroleum varnish and carbon buildup, classic 1-gallon or 5-gallon chemical dip cans remain an industry staple. These containers include an internal dipping basket. Submerge the fully disassembled metal carburetor body and brass jets for 2 to 4 hours (avoid soaking rubber seals or plastic floats). The aggressive polar solvents dissolve oxidized fuel gum down to bare metal without requiring mechanical agitation or electricity.
Method 3: Precision Aerosol Spray & Mechanical Micro-Reaming
For quick field repairs, nothing replaces direct mechanical and aerosol flushing:
- Strip the carburetor and remove the pilot and main jets.
- Spray aerosol carburetor cleaner (containing toluene and acetone) through every passage using the thin red nozzle straw.
- Visually verify that solvent sprays cleanly out of all transition ports and idle mixture discharge holes.
- Use a set of dedicated wire tip-cleaning broaches (or soft single copper wire strands) to clear stubborn deposits from brass orifices. Never force oversized steel wires through calibrated jets, which permanently changes jet bore diameters.
Substrate & Alloy Guidelines: Protecting Delicate Castings
Regardless of which cleaning method you choose, protect the non-ferrous alloys found in precision fuel systems:
- Never Use Caustic Lye or Heavy Oven Cleaners: Sodium hydroxide aggressively attacks cast aluminum, turning it black and pitting mating gasket surfaces within minutes.
- Strip All Elastomers Before Soaking: Remove all Viton needle tips, accelerator pump diaphragms, choke pull-off membranes, and float bowl gaskets. Solvents cause rubber to swell and fail.
- Blow Out Passages with Dry Compressed Air: Immediately after washing and rinsing, blow 90 PSI compressed air through every orifice to expel trapped water droplets that could otherwise cause internal flash corrosion.
Frequently Asked Questions
Can I safely make a sander cleaner using water and dish soap?
Using water and liquid dish soap eliminates the chemical flash-fire risk because water is non-flammable. However, electrical safety rules still apply: water splashing into an ungrounded 120V electric tool creates a severe electrocution hazard. Furthermore, low-frequency sander vibration in soapy water is still ineffective at scouring hard fuel varnish from small pilot jets.
Why won’t regular carburetor spray clear an idle passage?
The idle circuit in a motorcycle or small-engine carburetor features passages with diameters as small as 0.010 to 0.015 inches (0.25 mm to 0.38 mm). Over months of sitting with old ethanol-blended fuel, the lighter fuel fractions evaporate, leaving behind heavy petroleum varnishes that harden into a ceramic-like amber gum. Surface spray bounces off this hardened plug without dissolving it unless given sustained chemical soak time or ultrasonic cavitation energy.
How can I tell if my carburetor’s internal passages are truly clean?
Hold the stripped carburetor body up to a bright workshop inspection light and peer through the pilot jet gallery while observing the tiny transition holes located just behind the throttle plate. You should clearly see distinct points of light passing through each micro-hole. Alternatively, squirt aerosol cleaner or brake cleaner through the gallery and observe uniform, needle-thin fluid streams shooting crisply from every port.
Get our latest guides, news, and insights highlighted in your Google Search & AI Overviews.


