
How to Dismantle the Top of a Washing Machine: Step-by-Step Disassembly Guide
✨ This article was AI edited. Editorial responsibility: CrownClassicCleaners.net.
Produced with AI. This article was artificially generated. Editorial responsibility: CrownClassicCleaners.net.
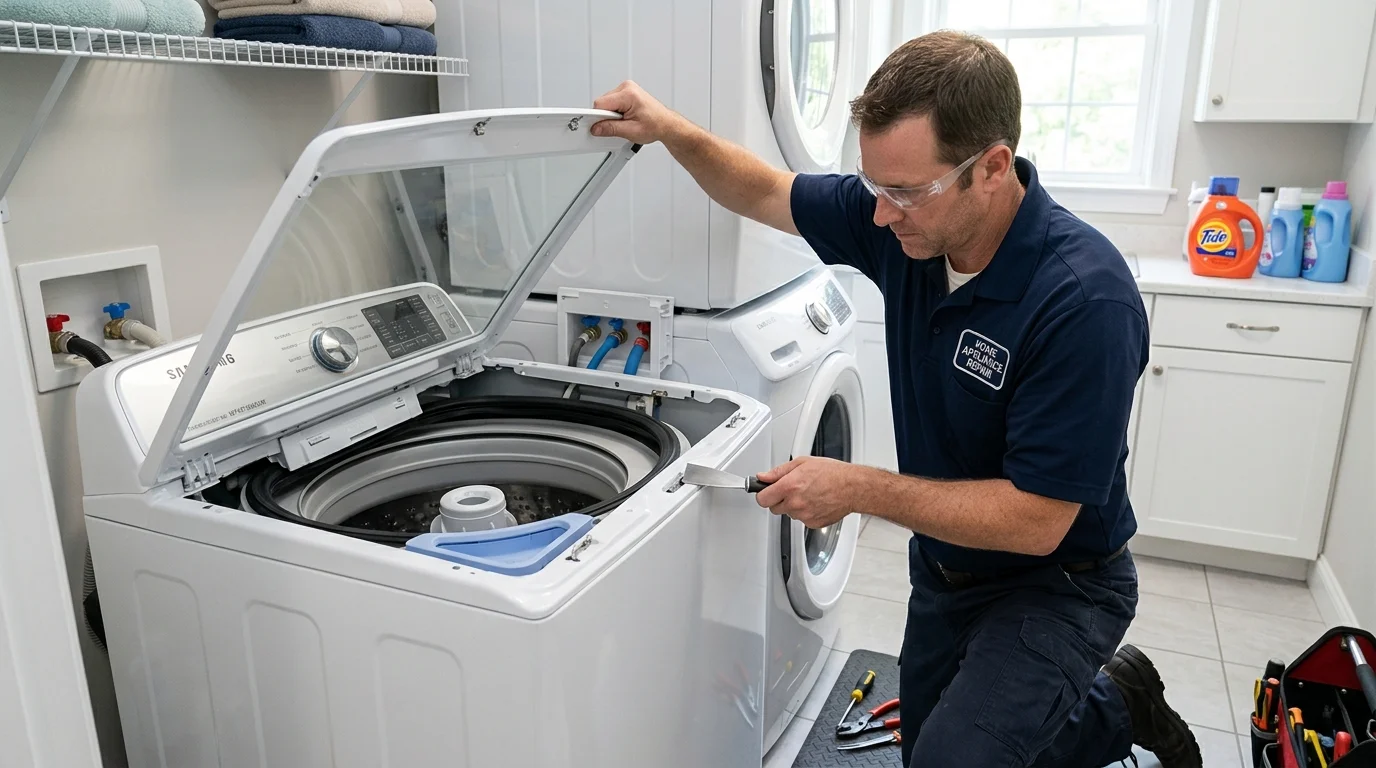
To dismantle the top panel of a washing machine, unplug the power cord and shut off both water inlet valves, identify your washer’s chassis style (front spring clips on traditional top-loaders vs. rear perimeter screws on front-loaders), insert a stiff putty knife into the front horizontal seam approximately 3 to 4 inches inward from each front corner to compress the spring clips, tilt the main top panel upward, disconnect the electronic lid lock wiring harness, and unclip the plastic tub splash ring to fully expose the internal wash drum for deep cleaning or mechanical repairs.
Whether you need to replace a failing electronic lid lock, install new suspension dampening rods to cure severe tub shaking, clear calcified detergent gunk from dispenser siphon ports, or perform a comprehensive mold decontamination around the outer wash tub rim, dismantling the top panel of a residential washing machine is the fundamental gateway procedure. While modern appliances appear sleek and seamlessly sealed from the factory, manufacturers design appliance cabinets with hidden spring catches and modular fastening systems that allow rapid service access once you know the exact release points.
Chassis Architecture: Top-Load vs. Front-Load Configurations
The method required to remove the top cover depends entirely on the mechanical orientation and brand family of your washing machine:
| Washer Type & Brand Family | Top Fastening Mechanism | Primary Access Method | Electrical Harness Considerations |
|---|---|---|---|
| Standard Top-Loader (Whirlpool, Maytag, Kenmore, Roper) | Twin spring-steel clips in front horizontal seam | Depress spring clips with a stiff putty knife; tilt top back on rear hinges | Lid switch / optical lock wiring harness must be unclipped before lifting free |
| Modern HE Top-Loader (Samsung, LG, GE Profile) | Rear console brackets + front hidden release tabs | Remove rear corner cover caps and screws; slide top forward or release clips | Digital touch console ribbons and water valve solenoid wires |
| Front-Load Washers (Whirlpool, LG, Samsung, Electrolux, Bosch) | Two to three rear hex or Phillips screws along back lip | Remove rear screws, pull the entire flat worktop straight backward 1 inch, then lift | Usually zero wiring attached directly to top cover; completely independent worktop |
| Commercial Top-Loaders (Speed Queen, Huebsch) | Front-facing service screws hidden beneath service door or spring tabs | Back out service screws with 5/16″ nut driver; lift heavy-gauge steel lid | Mechanical lid safety switch with spade terminals |
Essential Tools for Safe Disassembly
Before beginning, gather the necessary hand tools. Using incorrect tools—such as a flexible kitchen butter knife or oversized pry bar—can scratch powder-coated appliance paint or bend structural metal tabs:
- Stiff Putty Knife (1.5″ to 2″ wide): The single most critical tool. The blade must be rigid, not flexible, to compress heavy spring-steel clips. Wrapping blue painter’s tape around the blade prevents scratching the enamel finish.
- Nut Drivers (1/4″ and 5/16″): Standard sizes used for sheet metal screws across Whirlpool, Maytag, GE, and Frigidaire appliances.
- Phillips Screwdriver (#2): Needed for rear service panels and console brackets.
- Small Flathead Screwdriver / Spudger: To release plastic wiring harness locking tangs without snapping delicate clips.
- Heavy-Duty Work Gloves: The unpainted underside of appliance sheet metal possesses razor-sharp stamped edges that will slice bare fingers.
- Bungee Cord or Wooden Support Dowel: To prop the heavy top panel securely while working inside the cabinet.
Step-by-Step Procedure: Top-Load Washer Disassembly
Step 1: Complete Power and Water Isolation
Safety is paramount whenever accessing appliance internals. Pull the washing machine away from the wall. Disconnect the 120V electrical power plug from the wall receptacle. Turn both the hot and cold water supply valves clockwise to the fully closed position. While not always necessary to disconnect water hoses when merely tilting the top panel on certain top-loaders, shutting off the valves prevents accidental flooding if a water inlet solenoid is bumped.
Step 2: Locating and Depressing the Spring Clips
Examine the horizontal hairline seam where the front vertical cabinet panel meets the horizontal top panel. Modern top-load washers are held in place by two heavy spring-steel retaining clips situated approximately 3 to 4 inches inward from the outer left and right front corners.
- Position your stiff putty knife flat against the seam, holding the blade horizontally.
- Push the blade firmly straight back into the seam until you feel the metal spring clip resist.
- Apply firm inward pressure while lifting upward on the front corner of the top panel with your free hand. You will feel the spring compress and hear a distinct mechanical “pop” as the clip releases.
- Maintain slight upward pressure on the freed corner and repeat the exact process on the opposite side to release the second clip.
Step 3: Tilting and Securing the Top Panel
Once both front clips are disengaged, the top panel will hinge upward from the rear. Lift the top panel slowly. Do not swing the top panel backward past a 90-degree angle without checking the rear harness; doing so can pinch water fill hoses or stretch electronic wire leads.
- Attach a heavy-duty bungee cord from the lid handle up to an overhead cabinet, water pipe, or shelf to hold the top open securely at roughly an 80-degree angle.
- Alternatively, carefully lean the panel back against the wall, placing a folded bath towel between the machine and drywall to prevent scuffs.
Step 4: Disconnecting the Lid Lock Wiring Harness
To remove the top panel entirely from the chassis for thorough maintenance, locate the wiring harness running from the electronic lid lock mechanism (located underneath the front right or left lip of the top panel) down into the lower main control board:
- Depress the small plastic locking tab on the harness connector using a small flathead screwdriver.
- Gently pull the connector halves apart—never pull directly on the colored copper wires.
- Unclip the plastic wire routing tree from the sheet metal cabinet frame.
- Slide the rear hinge pins out of their slots and lift the entire top assembly free from the machine, setting it upside down on a soft blanket.
Step 5: Removing the Tub Snorkel and Splash Ring
With the main top panel removed, the internal tub structure is fully exposed. You will see a large white plastic circular ring (the tub ring or splash guard) clipped to the top of the outer tub:
- The tub ring features 6 to 8 plastic retaining tabs around its perimeter.
- Use your fingers or a flathead screwdriver to pry each tab outward slightly while lifting upward on the ring.
- Lift the entire splash ring out of the wash tub. This exposes the outer perimeter where soap scum, fabric softener sludge, and black mold colonies accumulate unseen during normal wash cycles.
Step-by-Step Procedure: Front-Load Washer Top Removal
Front-load washing machines utilize a different, simpler worktop sliding system:
- Walk behind the unit and inspect the upper perimeter along the back lip of the machine.
- Locate the two or three perimeter retaining screws (typically 7 mm, 8 mm, or Phillips #2) securing the painted metal worktop to the rear frame brackets.
- Remove the screws and set them safely aside.
- Place your palms flat on the front edge of the top panel and push firmly toward the rear of the machine. The panel will slide backward approximately 1/2 inch to 1 inch, unlocking the interlocking retaining tabs along the side rails.
- Lift the panel straight up and off the machine. This provides full, unobstructed access to the water inlet valve manifold, noise suppression filter, detergent dispenser housing, and upper concrete counterweights.
Deep Cleaning & Maintenance Once Opened
Having the top of your washer dismantled provides a rare opportunity to tackle chronic laundry odor and mechanical issues that cannot be reached from the outside:
- Eradicating Tub Rim Mold: The underside of the tub ring and the top 3 inches of the outer tub are never submerged during normal cycles. They collect a thick layer of slimy bioslime composed of body oils, lint, and mildew. Spray this perimeter with a 1:1 solution of distilled white vinegar or an oxygen bleach detergent, scrub with a stiff nylon brush, and wipe completely clean with microfiber towels.
- Flushing Dispenser Jet Siphons: Fabric softener and liquid bleach create hard, calcified blockages inside the internal siphon tubes. Disconnect the small rubber distribution hoses and flush them with hot water to restore full chemical dispensing.
- Inspecting Suspension Dampeners: On top-load machines, inspect the four suspension rods hanging in each corner. Check for broken polymer ball joints, rust along the damper springs, or missing dampening grease. Replacing worn rods cures persistent “unbalanced load” (uL or Ub) error codes and machine walking.
Reassembly Checklist and Critical Checks
When putting the machine back together, follow this reverse sequence to ensure water-tight and electrically safe operation:
- Align the tub ring over the outer tub, ensuring the front bleach funnel aligns precisely with the dispenser chute. Press down firmly around the circumference until every plastic tab clicks solidly into place.
- Re-seat the top panel onto the rear hinges.
- Re-connect the electronic lid lock harness and ensure the locking tab clicks. Secure the wiring back into the retaining clips to prevent it from rubbing against the spinning tub during high-speed extraction.
- Lower the top panel down onto the cabinet. Place the heels of both hands directly over the front spring clip locations (3 to 4 inches from each corner) and strike downward firmly until both clips snap into their locked position.
- Re-open water supply valves, plug in electrical power, and run a short spin cycle to verify that the lid lock engages properly and the machine operates quietly with zero vibrations.
Frequently Asked Questions
Why won’t my washer top release when I push the putty knife?
On some older Whirlpool and Maytag models, the spring clips are located 4 inches inward, while on certain GE or Frigidaire models, they may be 2.5 inches inward. Slide the putty knife horizontally along the seam until you feel direct metal-on-metal spring resistance. Additionally, ensure you are pushing inward and slightly downward to unhook the clip tooth from the cabinet lip.
Can I bypass the lid switch while the top is open to test the motor?
Modern washing machines use complex electronic lid locks equipped with solenoid coils and magnetic Hall-effect sensors that communicate with the main computer board via pulse signals. Attempting to bypass these electronic switches with jumper wires will trigger error codes (such as dL, F5E1, or E22) and can permanently damage the main control board. Always test components with a digital multimeter with power disconnected.
Do I need to replace the spring clips if they bend during removal?
If a spring clip becomes bent or deformed during removal, use needle-nose pliers to bend the steel tang back to its original 45-degree angle before reinstalling the top panel. If the metal has fatigued or snapped, replacement spring clips are inexpensive and readily available under standard OEM appliance parts numbers.
Get our latest guides, news, and insights highlighted in your Google Search & AI Overviews.


