
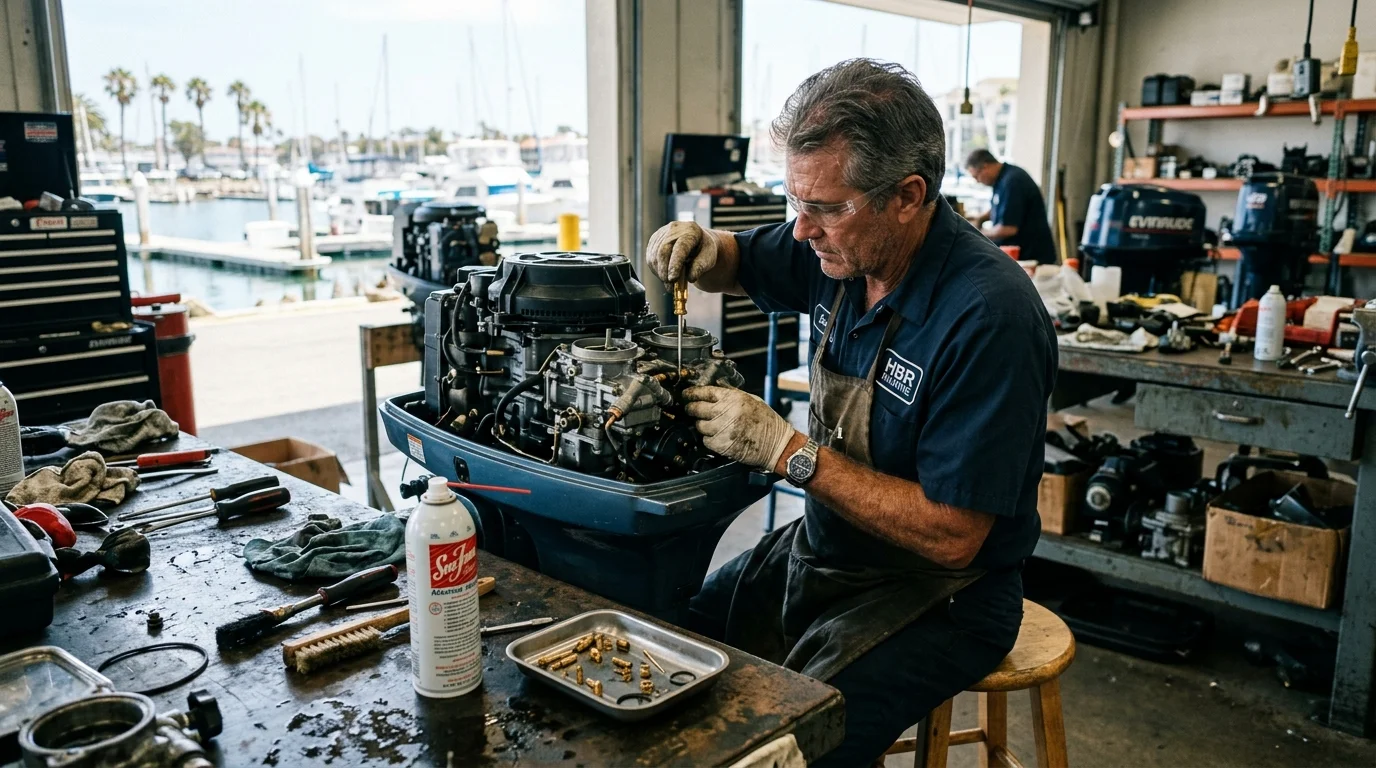
Outboard Carburetor Cleaner: Marine Fuel System Maintenance and Cleaning Guide
✨ This article was AI edited. Editorial responsibility: CrownClassicCleaners.net.
Produced with AI. This article was artificially generated. Editorial responsibility: CrownClassicCleaners.net.
To clean an outboard motor carburetor effectively, disconnect the fuel line and throttle linkages, unbolt the carburetor from the intake manifold, completely disassemble the float bowl, brass main and pilot jets, and emulsion tubes, submerge the bare aluminum casting and brass hardware in a dedicated marine-grade carburetor cleaner or an ultrasonic tank heated to 120°F (49°C), blow through all internal fuel metering passages with 90 PSI compressed air to dislodge gummy 2-stroke oil varnish, install a new carb rebuild kit with fresh Viton needle valves, and perform a link-and-sync adjustment upon reinstallation.
For boaters, anglers, and marine mechanics, an outboard motor that cranks vigorously but refuses to idle, dies when shifted into forward gear, or stumbles under acceleration is almost always suffering from a fouled carburetor. Marine outboards—whether traditional two-stroke workhorses or modern four-stroke outboards manufactured by Yamaha, Mercury, Evinrude, Tohatsu, or Honda—operate in one of the most demanding environmental crucibles imaginable: high humidity, salt-laden marine air, long periods of seasonal dormancy, and modern ethanol-blended pump gas. Understanding how to select the right outboard carburetor cleaner and execute a complete fuel circuit restoration is critical for reliable performance on the water.
The Marine Environment: Why Outboard Carburetors Fail Faster
Carburetors on boats experience severe operational stressors that terrestrial automotive or lawnmower engines never encounter:
| Environmental Stressor | Chemical & Physical Mechanism | Impact on Marine Carburetor |
|---|---|---|
| Ethanol Phase Separation (E10) | Ethanol hygroscopically absorbs atmospheric moisture until water-ethanol slurry drops to tank bottom | Injects corrosive, acidic water into float bowl; causes rapid aluminum pitting and white oxide crust |
| Two-Stroke TC-W3 Oil Evaporation | Gasoline evaporates out of float bowl during storage, leaving concentrated two-stroke oil film behind | Forms a sticky, waxy blue-green varnish that seals tiny pilot (idle) orifices shut |
| Salt Air Galvanic Corrosion | Electrolyte salt spray bridges dissimilar metals (brass jets vs. die-cast aluminum body) | Seizes brass needle threads; causes galvanic bonding and stripped jet heads during teardown |
| Intermittent Seasonal Usage | Boats sit idle for weeks or months between weekend outings or winter storage | Allows fuel varnish to cure into a hard, ceramic-like lacquer impervious to fuel tank additives |
Because the idle jet in a small marine outboard can have an internal orifice smaller than 0.012 inches (0.30 mm), even a microscopic film of dried oil varnish restricts fuel delivery by 50% or more, causing the engine to sneeze, backfire through the intake, or stall immediately upon shifting.
Selecting the Right Outboard Carburetor Cleaner
Not all carburetor cleaners are safe for marine engines. Selecting the right product depends on whether you are doing on-engine maintenance or a complete benchtop teardown:
1. High-Solvency Aerosol Sprays (Bench Cleaning & Passage Testing)
Dedicated aerosol sprays blending acetone, toluene, and methyl ethyl ketone (MEK) provide instant mechanical blast pressure and chemical solvency. They are essential during bench reassembly to verify open fuel passages. However, aerosol cleaners should never be sprayed indiscriminately into an assembled outboard with the rubber cowl and air intake attached, as aggressive solvents will dissolve plastic air boxes and swell fuel primer bulbs.
2. Ultrasonic Aviation / Marine Surfactant Solutions
For multi-carburetor setups (such as triple-carb V6 outboards), heated ultrasonic cleaning tanks utilizing Simple Green Pro HD or Extreme Simple Green Aircraft Cleaner diluted 1:3 with distilled water are the industry gold standard. Ultrasonic cavitation reaches blind passages that sprays cannot penetrate, without releasing toxic chlorinated fumes or posing a fire risk in the workshop.
3. Marine Fuel Additives & Chemical Soaks (In-Tank Prevention)
Formulations such as Yamaha Ring Free Plus, Mercury Quickleen, and Sea Foam Marine contain polyetheramine (PEA) detergent chemistry designed to clean carbon and light fuel varnish while the engine is running. While exceptional for ongoing prevention and carbon clearance on piston crowns, fuel additives cannot unclog a pilot jet that is already 100% blocked with dried lacquer.
Step-by-Step Outboard Carburetor Rebuild Protocol
Step 1: Removal and Throttle Linkage Tagging
Shut off the boat’s fuel selector valve. Disconnect the main battery ground. Remove the outboard cowling and unbolt the black plastic air silencer box. On multi-cylinder outboards with multiple carburetors, photograph the intricate throttle and choke synchronization linkages before detaching any plastic ball-and-socket links. Label each carburetor by cylinder number (Top, Middle, Bottom); jets are often staggered by cylinder position to compensate for thermal differences.
Step 2: Total Teardown and Rubber Component Removal
Take the carburetor to a clean, well-lit workbench lined with a chemical-resistant parts tray. Remove the four float bowl screws and drop the float chamber. Slide out the float hinge pin and carefully lift the plastic or brass float along with the tiny triangular float needle valve. CRITICAL: Separate every rubber O-ring, bowl gasket, acceleration pump diaphragm, and plastic jet plug. Organic solvents cause non-metallic parts to swell, distort, and fail.
Step 3: Removing Calibrated Brass Jets
Select a flathead screwdriver whose blade tip matches the jet slot width and thickness exactly. Using an undersized screwdriver will strip the soft brass slot, permanently locking the jet inside the aluminum body. Back out:
- Main Fuel Jet: Located at the base of the central emulsion tube tower.
- Main Nozzle / Emulsion Tube: Often drops out from the center column after the main jet is removed; features dozens of micro-holes along its shank that mix air and fuel.
- Slow / Pilot (Idle) Jet: Located recessed in the top or side gallery; controls all starting and low-speed troll operation.
- Idle Air / Fuel Mixture Screw: Note the exact number of turns to lightly seat before removing (e.g., “1.5 turns out from light bottom”) to preserve baseline baseline settings.
Step 4: Ultrasonic or Immersion Chemical Wash
Submerge the stripped metal casting and brass components in your cleaning tank. If using an ultrasonic machine, set the temperature to 120°F (49°C) and run a 25-minute cycle. If using a cold parts dip can (such as Berryman Chem-Dip), submerge in the wire basket for 1 to 2 hours. The chemical bath dissolves dried 2-stroke oil gum, petroleum polymers, and calcium corrosion deposits.
Step 5: High-Pressure Compressed Air Flush
Immediately after cleaning, rinse the carburetor casting in clean water or light solvent, then use a compressed air blow gun set to 90 PSI. Direct the nozzle tip into every hole, passageway, and orifice. Look for the fine mist of air exiting corresponding discharge holes near the throttle plate. If resistance is felt, thread a soft 0.010″ copper wire (stripped from stranded electrical wire) through the jet hole. Never use hardened steel wire, welding tip files, or drill bits, which ream the calibrated brass bore and destroy fuel metering.
Step 6: Reassembly with Genuine Rebuild Kit
Always install a fresh OEM or high-grade marine carburetor kit containing a new Viton-tipped needle valve, brass seat, float bowl gasket, and mixture screw O-rings. Set the float height according to factory service manual specifications by measuring the distance between the inverted bowl gasket surface and the bottom of the float with a vernier caliper.
Multi-Carb Link-and-Sync Procedure
On outboards equipped with two, three, or four carburetors, simply cleaning the carbs is only half the battle. You must perform a “Link and Sync” adjustment. Loosen the throttle synchronization screws, hold all throttle butterfly plates fully closed against their bores, tighten the sync clamps, and adjust the idle timing stop screw. This ensures every cylinder receives an identical air-fuel volume simultaneously, eliminating rough shaking and stalling at idle.
Preventing Future Marine Fuel Gumming
To ensure your newly cleaned outboard starts on the first crank next season:
- Run Non-Ethanol Marine Gas (REC-90): Whenever possible, purchase ethanol-free recreational gasoline at marina fuel docks or gas stations.
- Install a 10-Micron Water-Separating Fuel Filter: Mount an external spin-on canister filter between the boat tank and engine to trap water and debris before it reaches the carburetor bowl.
- Run the Carburetors Dry: If the boat will sit for more than two weeks, disconnect the fuel line with the engine running at idle and allow it to run until it stalls. Open the brass bowl drain screws on each carburetor to evacuate the remaining tablespoon of stagnant fuel.
Frequently Asked Questions
Can I clean an outboard carburetor without removing it from the boat?
Spraying aerosol cleaner down the throat of an assembled, running outboard only washes the throttle bore and butterfly plate; it does not clean the internal fuel passages or pilot jets where 95% of clogs occur. The only way to clean a plugged idle circuit is to remove the carburetor, drop the float bowl, and physically clean the brass jets.
Why does my outboard start with the choke on but die when I turn it off?
Engaging the choke severely restricts airflow, pulling massive vacuum that forces fuel through secondary or main circuits. When the choke is released, normal airflow resumes, and the engine must draw fuel through the pilot (idle) jet. If the engine dies immediately, the pilot jet or idle discharge ports are clogged with dried fuel varnish.
Is automotive carb cleaner safe for outboard motors?
Automotive aerosol carb cleaners can be used on bare, disassembled metal outboard carburetor components. However, they must never be sprayed on assembled marine engines where overspray contacts plastic intake silencers, rubber fuel lines, or painted cowlings, as automotive cleaners contain aggressive aromatic hydrocarbons that melt marine plastics and strip paint.
Get our latest guides, news, and insights highlighted in your Google Search & AI Overviews.


