
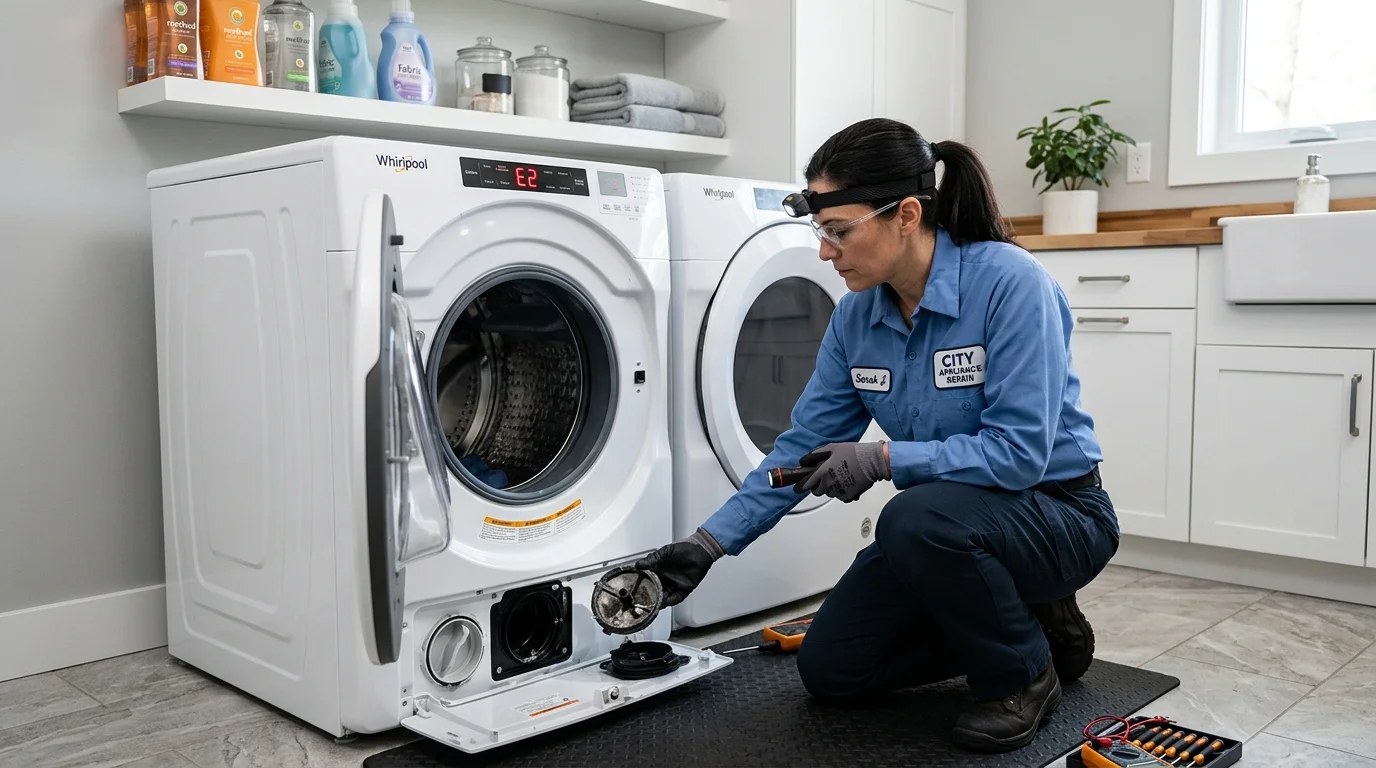
Washing Machine Error Code E2: Causes, Drain Pump Fixes, and Reset Guide
✨ This article was AI edited. Editorial responsibility: CrownClassicCleaners.net.
Produced with AI. This article was artificially generated. Editorial responsibility: CrownClassicCleaners.net.
Washing machine error code E2 (or E02) indicates a water drainage timeout or drain pump failure, signaling that the washing machine’s main control board detected water remaining in the tub beyond the maximum programmed cycle limit (typically 5 to 8 minutes). To resolve error code E2, unplug the washer, drain standing water via the lower front emergency drain tube, remove and rinse the debris filter (coin trap) to dislodge trapped hairpins, coins, or lint plugs, check the rear corrugated drain hose for kinks or blockages, inspect the pump impeller for physical obstructions, and test the drain pump motor coils with a digital multimeter (expecting 12 to 25 ohms) before resetting the control board.
Few domestic frustrations match the sinking feeling of discovering your washing machine stalled midway through a cycle, filled to the glass brim with sudsy, stagnant water while a flashing red or amber “E2” error code illuminates the digital display panel. The E2 error code is one of the most universal diagnostic trouble codes encountered across modern front-load and top-load washing machines. While a drainage error can occasionally stem from an electronic motherboard failure, over 90% of E2 faults are caused by simple physical blockages, clogged coin trap filters, kinked discharge lines, or foreign objects jamming the mechanical drain pump impeller.
Brand-by-Brand Variations: What Does E2 Mean on Your Machine?
While the vast majority of appliance manufacturers utilize E2 to signify water drainage failure, subtle diagnostic differences exist between brand families:
| Manufacturer / Brand Family | Specific Fault Code Definition | Programmed Trigger Condition | Primary Hardware Suspect |
|---|---|---|---|
| Haier, Midea & Hisense | Drain Failure / Water Evacuation Timeout | Water level sensor does not reach “empty” state within 6 minutes of pump activation | Coin trap filter debris, jammed impeller, burnt drain motor |
| Whirlpool & Maytag (Global Platforms) | Drain Pump Error / Slow Drain Timeout | Pump runs continuously for 8 minutes without pressure switch reset | Foreign object in drain pump, pinched drain hose, air dome clog |
| Candy, Hoover & Zerowatt | Water Fill Fault or Drain Interlock (E02) | Water fails to reach minimum wash level or fails to empty in programmed window | Inlet solenoid valve, drain pump, pressure sensor hose |
| Kenmore & Frigidaire | Drain Restriction | Tub fails to drain at rate of >15 gallons per minute during spin transition | Drain pump filter obstruction, check valve stuck closed |
| Bosch & Siemens (Legacy E02/F02) | Aquastop / Drain System Timeout | Water detected in base pan or evacuation timeout exceeded | Base plate float switch, drain pump impeller jam |
Essential Tools for Diagnosing Error Code E2
Troubleshooting and repairing an E2 fault requires minimal household tools:
- Shallow Catch Pan & Old Towels: To capture the gallons of trapped water inside the tub during manual draining.
- Pliers & Flashlight: To inspect the internal cavity behind the drain filter for coins, wire, or hairpins.
- Digital Multimeter: To measure electrical continuity and resistance across the drain pump motor terminals.
- Screwdrivers (Phillips #2 and 5/16″ Nut Driver): To remove the lower front or rear service access panels.
- Bucket & Shop Vacuum (Wet/Dry): For rapid water removal from the drum before opening the pump housing.
Comprehensive Step-by-Step Troubleshooting Protocol
Step 1: Electrical Isolation and Water Extraction
Never work on an appliance with water inside while connected to electrical power. Unplug the 120V power cord from the wall outlet. To avoid flooding your laundry room floor when opening the pump filter, locate the small rectangular access door at the bottom right or left front corner of the washing machine:
- Pry open the filter access door using a flathead screwdriver or fingernail.
- Pull out the small flexible rubber emergency drain hose (if equipped).
- Place a shallow pan beneath the hose, remove the rubber stopper plug, and allow the water to drain into the pan. Empty the pan repeatedly until water ceases to flow (often 3 to 5 gallons).
- Once drained, recap the emergency hose securely.
Step 2: Inspecting and Cleaning the Debris Filter (Coin Trap)
The debris filter is engineered to catch foreign objects before they enter and destroy the pump’s spinning plastic impeller:
- Place a thick bath towel directly beneath the circular filter knob to absorb residual runoff.
- Turn the large circular filter handle counter-clockwise (typically a quarter to half turn, or several full turns depending on thread design).
- Pull the filter basket straight out.
- Examine the extracted filter: you will commonly discover a tangled plug of hair, lint, pocket coins, collar stays, dental floss, or baby socks wrapped around the plastic cage.
- Rinse the filter thoroughly under a warm utility faucet, scrubbing away hardened bioslime with an old toothbrush.
- Shine a flashlight into the dark pump chamber cavity. Visually confirm that no coins or hairpins are wedged in the throat leading to the pump impeller.
Step 3: Checking the Mechanical Impeller for Jamming
Reach your index finger into the pump housing cavity and locate the plastic impeller cross-fan at the back of the chamber. Rotate the impeller manually with your finger:
- Normal Impeller Behavior: The impeller should turn with a distinct spring-like, magnetic resistance—clicking through quarter-turn increments as the permanent magnets pass the electromagnetic stator coils.
- Defective / Jammed Impeller: If the impeller refuses to budge, an object (such as a bra underwire or drywall screw) is jammed behind the blade. If the blade spins completely loosely with zero resistance, the impeller shaft has stripped free from the rotor, requiring total pump assembly replacement.
Step 4: Inspecting the Corrugated Drain Line and Standpipe
If the filter is clean and the impeller spins properly, the blockage is likely in the external discharge plumbing:
- Check for Physical Kinks: Pull the washer away from the wall and verify that the corrugated grey drain hose is not pinched against the baseboard or crushed beneath the machine.
- Standpipe Height & Siphoning: Building codes require the laundry standpipe to be installed between 30 inches and 96 inches above the floor. If the drain hose is shoved too far down into the standpipe (more than 4 to 6 inches) without an air gap, a vacuum siphoning effect occurs, pulling waste water back into the machine and triggering an E2 error.
- Clearing Internal Hose Obstructions: Detach the drain hose from the rear of the machine and blow through it or flush it with a garden hose to verify unobstructed water flow.
Step 5: Testing the Drain Pump Motor with a Multimeter
If physical blockages are ruled out, the electrical drain pump motor itself may have suffered coil burnout or thermal breakdown:
- Disconnect the two electrical wire harness terminals from the drain pump motor spade connectors.
- Set your digital multimeter to the lowest resistance setting (Ohms / Ω).
- Touch the meter probes to the two metal spade terminals on the pump motor.
- Expected Resistance Reading: A healthy residential drain pump motor should read between 12 and 25 ohms (or 150 to 250 ohms on certain high-efficiency inverter brushless models).
- Faulty Readings: If the meter displays “OL” (open line / infinite resistance), the copper winding has severed. If it reads 0 ohms, the coil has short-circuited. In either case, install a new OEM drain pump assembly.
Step 6: Inspecting the Pressure Switch and Air Dome Tube
Modern washers monitor water levels via an analog or digital pressure sensor connected to the lower outer wash tub by a thin, 1/4-inch clear vinyl air tube. As water fills the drum, air inside the tube compresses, triggering the pressure sensor. If the air dome trap at the base of the tub becomes clogged with dried liquid fabric softener or calcified detergent sludge, the trapped air pressure cannot drop when the machine empties, causing the computer board to believe the tub is still full of water and triggering a persistent E2 error.
Pull the vinyl tube off the pressure switch, blow firmly through the tube toward the wash tub until you hear clear bubbling or air movement, and reattach the hose tightly.
How to Clear and Reset the Error Code
After resolving the blockage or replacing defective hardware, execute a system reset to clear the stored fault from the microcontroller memory:
- Press the Power button to turn off the display.
- Unplug the washer’s electrical power cord from the wall for a full 5 minutes to allow the onboard capacitor storage to discharge.
- While unplugged, press and hold the Start / Pause button for 10 seconds.
- Plug the power cord back into the wall outlet.
- Turn the machine on and select a short Drain & Spin or Rinse & Spin cycle without clothes to confirm the pump runs quietly and evacuates water within 90 seconds.
Preventing Recurrent Drainage Errors
To ensure your washing machine never stalls with an E2 code again:
- Check Garment Pockets: Empty all pockets before laundering to keep coins, keys, screws, and paper tissues out of the pump.
- Use Delicate Laundry Mesh Bags: Always place baby booties, lingerie with underwires, and thin micro-socks inside zippered wash bags.
- Run Monthly Affresh / Vinegar Tub Cleans: Use high-temperature maintenance wash cycles with dedicated oxygenated tub cleaners to prevent soap slime from accumulating inside the air dome and drain sump.
- Clean the Coin Trap Every 60 Days: Make inspecting and rinsing the front debris filter a regular bi-monthly maintenance routine.
Frequently Asked Questions
Can I open the front door of my front-loader if E2 is flashing?
No. If water is visible above the bottom lip of the front door glass, opening the door lock will immediately dump gallons of dirty water onto your laundry room floor. Always drain the water manually using the lower emergency drain hose or a wet/dry shop vac before opening the door.
Why does my drain pump hum loudly when E2 displays?
A loud electric humming or buzzing sound combined with zero drainage indicates the pump motor is receiving 120V electrical power and trying to turn, but the mechanical impeller is physically jammed by a solid foreign object (such as a coin or screw) lodged inside the pump housing.
How much does it cost to replace a washing machine drain pump?
A replacement OEM drain pump assembly typically costs between \$35 and \$85 USD for DIY installation. If hiring a professional appliance repair technician, total repair costs including diagnostic trip charge and labor generally range between \$150 and \$275 USD.
Get our latest guides, news, and insights highlighted in your Google Search & AI Overviews.


